The Plan
I picked Stellarium to control my Celestron NexStart 6SE.Stellarium has a plugin that lets you control a Telescope. Stellarium would send commands over the network to 'node-telescope-server' that was listening on the Raspberry Pi. The commands would be relayed to the Nexstar from the Raspberry Pi.
Although I'm using a Raspberry Pi, the node-telescope-server can be installed on a beagle board too. Also Stellarium is available for Mac, Windows and Linux so I'm not locked down to using my Macbook.
Preparing the Raspberry Pi
The Raspberry Pi is using this Raspbian OS build: 2013-09-25-wheezy-raspbian.zip. You can download it from here: http://www.raspberrypi.org/downloadsThere are tons of references online on how to use the image file. I used Win32DiskImager to lay the image on a 4GB SD card.
These are the configuration options I selected on the first boot of the Raspberry Pi:
- expand_rootfs – select expand_rootfs to expand the root partition to fill out the whole SD card
- memory_split – the minimum (16mb) - I don't intend to start any intensive graphical tasks.
- change_pass – replace the default password
- ssh – enable the ssh server, so that I can use ssh to log in from my laptop
- keyboard, timezone and locale - update these
To change these settings in the future use: sudo raspi-config
Reboot. Connect ethernet.
Installing Node
The node-telescope-server installation kept failing. I realized that I would manually need to upgrade the nodejs version.- Create a node directory under the /opt directory for node:
- sudo mkdir /opt/node
- Download the latest version of node for raspberry pi (arm-pi):
- wget http://nodejs.org/dist/v0.10.21/node-v0.10.21-linux-arm-pi.tar.gz
- Decompress file:
- tar xvzf node-v0.10.21-linux-arm-pi.tar.gz
- Copy the contents of the decompressed directory to the node directory we created earlier:
- sudo cp -r node-v0.10.21-linux-arm-pi/* /opt/node
- Create a symbolic link to both node and npm in /usr/local/bin:
- sudo ln -s /opt/node/bin/node /usr/local/bin/node
- sudo ln -s /opt/node/bin/npm /usr/local/bin/npm
- Check the version of node:
- pi@raspberrypi ~ $ node -v
- pi@raspberrypi ~ $ npm -v
Installing node-telescope-server
This is the home of node-telescope-server: https://github.com/fcsonline/node-telescope-serverInstall it: sudo npm install node-telescope-server -g

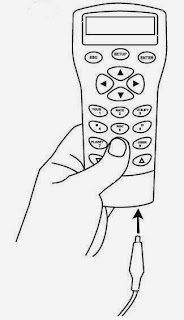
Connect your USB to RS232 Dongle to the Raspberry Pi and the handcontroller of the telescope.
Now lets figure out which terminal node the USB device is connected to
pi@celestron ~ $ lsusb
Bus 001 Device 002: ID 0424:9512 Standard Microsystems Corp.
Bus 001 Device 001: ID 1d6b:0002 Linux Foundation 2.0 root hub
Bus 001 Device 003: ID 0424:ec00 Standard Microsystems Corp.
Bus 001 Device 004: ID 0557:2008 ATEN International Co., Ltd UC-232A Serial Port [pl2303]
pi@celestron ~ $sudo modprobe usbserial vendor=0x0557 product=0x2008
pi@celestron ~ $dmesg
[ 14.191324] USB Serial support registered for pl2303
[ 14.316493] pl2303 1-1.2:1.0: pl2303 converter detected
[ 14.395813] usb 1-1.2: pl2303 converter now attached to ttyUSB0
Ok, so its connected to ttyUSB0. Lets start node-telescope-server and point it to that serial node.
pi@celestron ~ $ nts -s stellarium -p 5000 -t nexstar -i /dev/ttyUSB0
Remote stellarium control server running at port 5000 to a nexstar telescope
Setup Stellarium
Download and install Stellarium on your remote machine. http://www.stellarium.org/Open Stellarium and press Ctrl+0 (Command+0) or go to the telescopes window. Add a new telescope and choose the External software or remote computer.
Choose a name for your telescope, like "NodeJS-RaspberryPI". Then specify the ip assigned to the RaspberryPI and the port listening by nts instance, in my case 192.168.1.15 and 5000. Save the telescope configuration.
The last step is to click on connect button and the status label should change to "Connected".
Finally you have the Stellarium connected to your telescope!
Choose the desired object and pres the Ctrl+1 to slew the scope to your target.
Ta-Da!
Note: I keep hitting the slew limits on the Scope after a few wild slews. I have yet to investigate the settings on the scope - some day...
References:
http://blog.rueedlinger.ch/2013/03/raspberry-pi-and-nodejs-basic-setup/http://doctorbin.tumblr.com/post/53991508909/how-to-install-the-latest-version-of-nodejs-npm-and
https://github.com/fcsonline/node-telescope-server
http://nodejs.org/dist/v0.10.21/

